Interview with Roboboogie Strategic Designer, Chaylee Brown

chaylee brown's graphic art

This week, we’re chatting with Roboboogie’s newest Strategic Designer, Chaylee Brown, to learn more about her process with creative problem solving, and the role data plays in the creative workflow. Curious about where industry tools are headed? Read on!

How do you describe what you do?

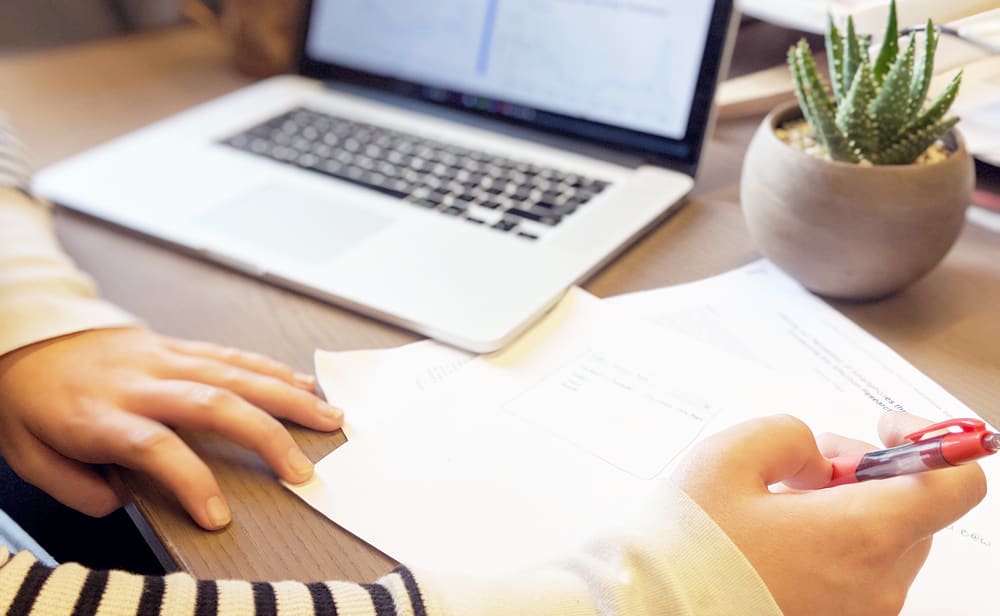
I do a lot of things! I create, I dabble, I listen, I change, I think, I doodle, I think some more, I eat a bowl of ramen, I give some high fives, I learn and I grow. My job, simply put, is to make people’s lives easier. I achieve that through creative problem solving and emotional, user-focused design. I start by figuring out the core issue at hand (it’s never what you think it is!) and then work my way forward towards a solution through brainstorming, sketching, wireframing, and prototyping. Once the super awesome, new and improved user experience has been crafted, I make sure the users can actually navigate it by adding a visual design layer. This is where color, typography, and visual cues come into play. If I’ve done my job correctly, users shouldn’t even notice what I’ve done. Experiences should be fluid, and streamlined so that the user doesn’t have to worry about how to get from point A to point B, They just do.

What did you want to be when you grew up? Did you always want to be a designer?

Nope,  I was dead set on training/protecting killer whales until I started high school and they stopped making “Free Willy” movies. I took my first graphic design class shortly thereafter.

What is a skillset that you use every day, but never thought you would have to?

So many forms of communication! I learned quickly in this field that just because I surround myself with like-minded, creative people, that does not mean we all communicate the same way. Every client comes with a unique way of understanding the work I do, and communicating their thoughts. There’s a learning curve each time to get on an even playing field where we can openly discuss the work, and it’s a challenge I’ve come to anticipate and enjoy. Communication is such a fundamental part of a user experience, so to be constantly learning new ways to communicate helps me become a better, more empathetic designer.

How do you approach solving problems?

Research, and asking A LOT of questions. I also do a lot of casual moodboarding on Pinterest to get my brain working, alongside brainstorming in my sketchbook.

What is some advice you would have for someone who is new to letting data drive their design process?

The data does not define you. If the data shows your design was a dud, that does not make you a failure, that makes you a better designer, because now you have something to work against. Data-driven design means you are going to fail, and you’ll probably fail more times than you’d like to think, but that just means you’ve got to keep coming up with more cool ideas and solutions! And when you succeed, seeing that data makes you feel like a superhero.

What user experience trends or tools are you currently most excited about?

Personalized interfaces and accessible design! In recent years there’s been a huge increase in ways users can personalize their experiences to suit their needs. For example, I’ve seen countless sites and apps that allow users to change font size, typeface, and background color of an article or book. There’s also been an increase in awareness for making sites and apps ADA-accessible, which is really awesome. I’m hoping the next UX leap in terms of accessibility will involve making closed captioning not terrible! As someone who is hard of hearing, I’ve had my fingers crossed for many years 🙂 Let’s make it happen!

Thanks for sharing your design wisdom with us, Chaylee! If you would like to learn more about Roboboogie, check out  teamroboboogie.com.

Stay tuned for next month’s interview with another Roboboogie pro!

To Succeed, First Define Success

collaborating to create strategy

When creating a digital experience, we all do so with the intention of being successful, but what success means must be documented and collaboratively understood to drive strategy and direction. A team needs to come to a consensus of what success looks like so all members can work together towards a common goal.

However, this is more difficult than it sounds. Individuals have personal goals that they are held accountable to, which may conflict with their teammates’ ambitions. Additionally, it is common for individuals to document goals independently, resulting in one person who believes a campaign is successful while another thinks it missed the mark. Finally, technology can get in the way: marketing calendars may not be integrated, resulting in a lack of support from required resources.

Defining success will help you and your team stay on track, remain focused, and effectively execute. The following will provide some tips for defining success:

Start early

To be successful, it is important to define success early in the project. By documenting what success is, the team will have a metric (or group of metrics) to strive for and design towards. This sets the groundwork for coordination between team members to make the most of all available resources, setting the team up for a group success that everyone can support.

Success should be documented in the form of specific metrics that can be tracked. If your goal is better understood qualitatively, determine what metric can be used that best represents that success. One example that is often discussed is brand loyalty, which could be tracked with success metrics, such as:

  • Social media followers
  • Return visitors to websites
  • Repeat customers
  • Time on site
whiteboarding to identify success metrics

Focus on what is important

It can be daunting and uncomfortable to put a metric to success. It is important to remember that the more simple the metric, the better. If a metric is well-understood, it is more likely that the team will understand the value that they are working to produce.

Focus on what makes your business successful. If you are looking to increase revenue, use that as the key performance indicator (KPI). With revenue as your KPI, success metrics such as conversion rate and average order value should be your focus. The intent is to increase revenue by improving conversion rate and average order with a more effective digital experience.

Lean on industry resources

The first place to start is looking at industry benchmarks. Depending on what type of experience you are optimizing, you should be able to find benchmarks that can help you determine a baseline for success. These provide insights outside of your bubble that can help you understand if you are wildly successful or only just moving the needle in your ecosystem.

A few industry benchmark references:

Jesi Wu drawing up plans to define success

Utilize historical analytics data

Your previous success will help determine what you are working towards. By using your analytics tool of choice, you can determine what success looks like. If you do not have the metrics you need within analytics, consider implementing event and goal tracking or custom dimensions to better understand how your users are engaging with your experience. These conversions and micro conversions can help you find opportunities for success early in the journey.

Harness previous campaign and testing results

The most powerful way to optimize is through iterative testing, which allows you to build on learnings from previous campaigns and designs. Each time you iterate, you have a new benchmark to test against – allowing you to work towards an ever-more-successful experience.

Laptop showing data of new vs returning users and device breakdown

How roboboogie determines success metrics with a client

At roboboogie, we have a lot of experience working with clients to define success. Over the years, we have learned how important it is to be upfront and ask the tough questions. Though it may be uncomfortable at first, the result is a better process and delivery that leaves everyone happier.

  1. Look for the possibility of success
    When we first begin discussions with a potential client, we look for the possibility of success. Sometimes we find that clients are already very successful and that it does not make sense for them to work with us – after all, we will each only feel good about our work together if there is a positive return on their investment with roboboogie.
  2. Collaborate to determine success metrics
    Most of the time we will see that there is room for improvement (hint hint – most organizations, including us, could always use an extra hand). We start as basic as possible, looking at the KPI as defined by the client and the success metrics to support it. Sometimes the idea of success is apparent – increasing the metrics they are already working towards. Other times we have to pull from similar campaigns and use our experience to determine what success could look like. We always have a dialogue with our client about success and what it means – once we are all on the same page, we can move forward efficiently and quickly.
  3. Design with intention
    With our success metrics in mind, we can design with the intention of moving those metrics in a positive direction. Whether it’s at the strategy, UX/UI, or developer level (or even during reviews with the client), we will continuously reference the goal of the campaign and why the work supports that goal. This helps to keep everyone focused on the project at hand and makes the approval process straightforward.
  4. Reporting and analytics structure
    When setting up the analytics and reporting for our work, we do so knowing the metrics we want to track and how to track them. It makes the analytics setup straightforward, creating a cleaner dashboard for our clients.
  5. Iterate and build
    Once the work is live, we review the reports to determine how well our first iteration of work is performing. With this new information we can better inform our A/B testing, as well as identify any potential media strategies that can help to elevate the campaign. By having the success metrics defined, it is much easier to find new opportunities to make a design even more compelling and powerful.

Written by Duncan Lawrence.

Getting Serious about Accessibility with New Relic’s Silas Sao

Nov Camp Optimization - Group gathers to socialize before talk

For the November installment of Camp Optimization, we had the opportunity to host Silas Sao, Sr. Product Designer at Cloudability, as he spoke on the importance of making sites and content accessible for all users.

Camp Optimization November 2017 speaker: Silas Sao

Silas has been crafting web experiences over the past ten years. While most of his work has been in the agency realm working with e-commerce sites, he has also had some exposure to the oil industry and a few non-profit organizations. Silas highlighted his three driving principles for design: empathy, integrity, and transparency. We think these are killer fundamentals to have, no matter what your line of work may be. He also stressed the importance of designing with intention, a philosophy with applicability far outside the agency space.

Now that you have a brief understanding of Silas’ background, it is easy to see what fuels his passion to make the web accessible for all.

First Things First

The first step to making accessibility a common practice is continual research on the topic. If you have made it this far, you’re headed in the right direction. Simply put, web accessibility means people with disabilities can fully use the web without held back by overcomplicated design, structure, or language. There are a few governing entities within web accessibility, which establish guidelines for accessibility.

The W3C (World-Wide Web Consortium) is the primary source for international standards, which also fostered the growth of WAI (Web Accessibility Initiative). There are three levels of accessibility requirements which are broken down into A, AA and AAA. Each of these levels do not exist independently, but instead must be built upon each other. In other words, you must be A certified before reaching the AA level, and so on. For more information on these certifications, check out the “Understanding Conformance” page from Web Content Accessibility Guidelines (WCAG). We hope to see the entirety of the web obtaining the AAA standard in the near future. In order to make it there, the process starts with a firm understanding of the principles of web accessibility. 

Camp Optimization November 2017 - audience socializing

Web Accessibility Principles

The principles of web accessibility exist to ensure the site is perceivable, operable, understandable, and robust for all users, not just the middle ground. Site perception stems from ensuring users can easily perceive onsite information. Information can not be invisible to all of their senses. A great way to get started on making sure your site is perceivable is to implement text alternatives for non-text content and provide subtitles on multimedia. This simple step allows users who may be visually or audibly impaired to easily understand the implied meaning of an image or video. To ensure the site is fully operable, it is important to give users enough time to read content and to provide help for users who are struggling to navigate and locate specific items. Making the site understandable means providing clear aid when a user makes a mistake, and providing guidance for correction. Finally, to ensure the site is robust, it is important to maximize compatibility with current and future tools that may present themselves to the user. Struggling to remember each of these? Conveniently, they form the acronym P.O.U.R. to drive this important information into your daily practice.

Camp Optimization November 2017: Silas Sao speaking

How to Get Started

We realize getting on the road to creating fully accessible sites may seem like a daunting task. Thankfully, Silas highlighted a few important places to start. The main impact points for accessibility can be broken down into:

  • Text: A fundamental part of every site, which is sometimes overlooked in regards to accessibility. One way to fix this is the implementation of accurate hyperlinks and ensuring the text is at an accessible reading level, which the industry has defined as a third grade reading level. Taking these two small strides will allow for a larger user base that can readily navigate your site.
  • Images: Double-checking to make sure images and video have been assigned alt attributes is also pivotal for accessibility. We occasionally see text encoded over images, but this presents some major issues, as that text is not selectable, searchable, or accessible to screen readers. The software is not able to interpret the text, thus leaving the user without the context of the page. For more on this, check out our blog post about image optimization.
  • Design: The key point Silas hit on in the design category was not using color to convey meaning. For example, for a visually impaired user, the overall value will be lost when something negative is displayed in red without any additional context. Providing additional descriptors to coincide with the color allows for interpretation for all.
  • Development: From a development standpoint, it is critical to use ARIA landmarks to allow the screen reader to work effectively.
  • Testing: Finally we have testing, a personal favorite of ours. Testing in this context goes outside the realm of focusing on improving conversion rates. From a usability perspective, it is important to test usability by conducting tests in various environments, web browsers, or devices that a user may navigate to your page with.

While we all may know what these words mean on their own, it is vital to put them into an accessibility context. Silas highlighted a quote from Dan Formosa, co-founder of Smart Design, that really resonated with our team:

If we understand what the extremes are, the middle will take care of itself.

Looking to Learn More?

We realize the overload of information may seem a bit daunting, but improvement starts with awareness of the situation. As we continue the push for web accessibility practices to become standardized, we will begin to see the positive impact across the web. Here are a few of Silas’ recommendations for useful places to start:

If you missed out on Silas’ presentation, we have another great event planned as we dive into the new year. On January 18th, Camp Optimization is happy to be hosting Kim Toomey of Lytics as she delves into the importance of personalization. We are excited to get the chance to hear Kim speak on the topic, and we can’t wait to see the crowd in January.

Camp Optimization November 2017: roboboogie case studies on table

What is Camp Optimization?

Camp Optimization’s mission is simple: provide a casual, fun and informative forum for digital marketers and technologists to share optimization best practices, challenges and wins.

Who is roboboogie?

roboboogie is a data-driven marketing, design and optimization agency from Portland, OR. We combine creative design and marketing science to create digital experiences that delight customers and ensure marketing success.

Written by Tyler Hudson

Optimizing Image Load to Increase Conversions

designer optimizing images for web in photoshop

Conversion optimization most commonly focuses on improving the user experience through refining UI, however it is important to not forget the first step: site performance. Page load time is one of the most common factors which influences bounce rate. In a recent Google study, 53% of mobile users abandoned sites that took more than three seconds for a page to load. This means it is imperative to evaluate and keep close tabs on web performance. In this post, we will breakdown one of the most common factors we have encountered in issues with load times: images not optimized for web.

Benefits of Image Optimization

Optimizing images for web is key as it offers opportunity for higher quality visuals (even with smaller file size), increased accessibility and visibility to search engines, and ADA compliance. 

There are two main areas of focus with optimizing images for web:

  • Choosing the right image format
  • Choosing the right file size

Addressing these two elements, and using them to your advantage, will have a profound effect on many KPIs for your website. Let’s take a closer look at image optimization and details to consider on your journey to a fully-optimized web page.

Choose the Right Image Format

The first step to optimizing your images is choosing the correct image format, with the main goal being to optimize the number of bytes needed to encode each pixel in an image. Start by selecting from the three universally supported image formats; JPEG, PNG, and GIF.

  • JPEG is the most common image format on the web. JPEG applies a lossy compression algorithm, which means some of the image quality is degraded when compressing the file size. Use this image format for photos and screenshots, as it supports 224 or 16,777,216 colors. Adobe Photoshop offers a great “Save For Web” feature that works with many different formats and sizes. Toggle through different quality settings to see impact on file size and ultimately load time. The following images were optimized for web at high quality (left; 70.79K), medium quality (middle; 9.97K), and low quality (right; 5.19K).
  • PNG files apply a lossless compression algorithm based on choosing the size of the color palette. PNGs should be used for files that require fine details to be preserved at any resolution. This format will provide the highest quality images, with the tradeoff of a larger file size. PNGs are also commonly used for images that require transparency (another reason they’re the right choice for logos), which JPEGs cannot be used for. For example:
    • PNG-24: 24 bits per pixel (16M colors)- good for complex images with lots of color, gradients, and fine detail. 
    • PNG-8: 8 bits per pixel (256 colors)- good for images with simple colors like logos, UI elements, buttons, etc.

PNG-24 (Wacom) vs. PNG-8 (roboboogie)

  • GIF files confine their 8-bit palette to 256 colors, and can have multiple frames. The compression of GIFs to a 256 color palette can create blotches and rendering issues in files with complex coloring, resulting in pixelation. For a limited color palette, PNG is a better selection as the images rendered for 256 colors will be of higher quality than GIFs. For this reason, GIFs should be used only for files that require animation.

Choose the Right File Size

The second step to consider is optimizing for file size. Our goal here is to optimize the total number of pixels in an image – this is where image compression comes into play.

Image compression falls into two categories: lossy and lossless. Lossy compression eliminates unnecessary pixel data, whereas lossless compression simply compresses pixel data. The result? Lossy compression filters will degrade the image quality, so you need to be careful with how much a file size is decreased. Lossless compression filters will need to be uncompressed before they can be rendered. There’s no hard-and-fast rule here as to which method is best; it’s very much a trial-and-error process, using different image formats for different purposes to see which filter or combination of filters works best.

Another element of choosing the right file size involves delivering scaled images. By serving users images that are naturally the size they appear to be on a webpage, you can reduce both load times and unnecessary pixels. For example, if you’re using a 200px by 300px image for a product catalog, best practice is to ship the image in that size rather than telling it to appear that size within the code. Loading an oversized image is not only costly to the overall load time due to the size of an image, but also because browsers have to map these images pixel-by-pixel when compressing them to their new size. This can be particularly expensive on mobile devices. 

If necessary, you can always have an option for the full size image to open independently in a new tab, or in a popup modal where the image gets loaded after the document is ready. It’s important to note that the tradeoff for quality is sometimes not worth a quicker load time. Each case is unique, so keep the user in mind when you are optimizing images. Go with the smallest file size that doesn’t compromise your requirements for quality.

Showing the save for web option on Photoshop

Additional Items to Consider

While image format and image size are two fundamental components to effective image optimization, there are a couple additional items to keep in mind.

Avoid Encoding Text in Images

Remember to use web fonts when possible to avoid confining text to images. Encoding text within images results in poor experience, as the text therein is not selectable, not zoomable, not accessible to screen readers, and not searchable. Responsive typography should be utilized as it’s own design element, and has the aforementioned capabilities that image text lacks. Text also has the benefit of rendering much more quickly over a call to grab an image and load it.

Name Your Files Appropriately and Assign Alt Tags

Always use image alt tags. Alt tags are essential for effective SEO, and make sure pages are accessible to screen readers and users with disabilities. Despite their necessity, alt tags are often under-utilized or omitted entirely from some web pages. Make sure to assign alt tags to all images, and name all images with descriptive words in common language. Search engines not only crawl the text on a webpage, but they also search for keywords within your code and image file names. This means assigning alt attributes to your images and using descriptive titles will have gains in search engine appearances as well.

Let’s take the following photo of roboboogie UX/UI Designer Lacie Webb, for example. As originally uploaded, the file name was “IMG_0681” which doesn’t provide crawlable benefits or context for readability. Adjusting the file name to “roboboogie-ux-designer-lacie-webb” before uploading will provide preliminary information about the content of the image. Additionally, the alt tag shown below, “Photo of roboboogie UX/UI Designer, Lacie Webb,” further supports the context (and benefits) we are looking for. In short, if you want a search engine to interpret the subject of an image, you need to tell it what that subject is in plain text, via the image title and the alt tag. Keep in mind these elements affect the source URL, which also clues browser in on the details of a page when named appropriately.

Lacie Webb headshot
Hover state displays alt image attribute

By implementing these strategies for image optimization, you’ll notice significant improvements in web performance and your users will have a better on-site experience. Good luck and happy conversions!

Written by Andrea Pappoff